Getting started
This guide walks you through installation and very basic setup of tests in a project. If you’re only interested in simple browser tests embedded in a web page, see the browser testing page.
Installing
Buster.JS on the command-line requires Node.js 0.6.3 or newer and npm. Node.js 0.6.3 and newer comes with npm bundled on most platforms.
OS X
- Get the latest Node installer from nodejs.org. You need Node 0.6.3 or newer.
npm install -g buster
Note
Installing npm packages with sudo causes multiple problems, and is
not recommended. If you cannot use npm without sudo after using the
installer, try changing ownership of the node installation to your user.
Linux
- Install Node 0.6.3 or later with your favorite package manager. If you don’t have one, follow these simple build instructions.
npm install -g buster
Windows
- Get the latest Node installer from nodejs.org. You need Node 0.6.3 or newer.
npm install -g buster
Create config file
Add a config file to your project. Call it test/buster.js
or spec/buster.js. This way you don’t have to tell Buster.JS about it
with --config every time you run tests. ./buster.js will
also be recognized.
var config = module.exports;

config["My tests"] = {
    rootPath: "../",
    environment: "browser", // or "node"
    sources: [
        "lib/mylib.js",
        "lib/**/*.js"
    ],
    tests: [
        "test/*-test.js"
    ]
}

// Add more configuration groups as needed
For browser tests, list all your source files in sources and test files in
tests. For Node.js tests, you don’t need to specify sources as you
typically require your source files directly in the test files.
Read the full configuration documentation for details.
Note that you may not “dot out” in sources, tests, etc. Paths are
resolved relative to the directory where the configuration file lives. If your
sources live outside this directory, adjust the root directory using the
rootPath property (which is also resolved against the config file location,
unless absolute).
Write tests
Given the config file above, all files named <something>-test.js in the
same folder as the config file itself will be loaded. You can of course change
the glob pattern to better suit your needs. **/*-test.js would for
example recursively load all <something>-test.js in the same folder the
config file is in, and all its sub folders.
A test case looks like this:
// Browser tests

buster.testCase("A module", {
    "states the obvious": function () {
        assert(true);
    }
});
The BDD inclined might prefer this alternate syntax:
buster.spec.expose(); // Make some functions global

describe("A module", function () {
    it("states the obvious", function () {
        expect(true).toEqual(true);
    });
});
If your test is a Node.js test, you also need to require Buster.JS:
// Node.js tests
var buster = require("buster");
var myLib = require("../lib/my-lib");

buster.testCase("A module", {
    "states the obvious": function () {
        assert(true);
    }
});
See the full Test case docs and referee docs for details. There are also mocks and stubs and more, via the buster-sinon module.
Run tests
Node.js tests
For testing on Node.js we recommend to install Buster.JS locally. If you have
installed it globally (-g flag in npm install -g buster) you have to ensure
it can be found by Node.js. One option is to set NODE_PATH to the global installed
modules, which is done during the installation of Node.js on linux automatically, but
unfortunately not on windows. Another option is to create a link to Buster.JS with the
command npm link buster executed in the root of the project.
Node.js tests can be run by simply typing node test/some-test.js. Doing
this requires nothing more than a file with tests (i.e. you don’t need the
above configuration).
While node test/my-test.js is nice and convenient, you want to use the
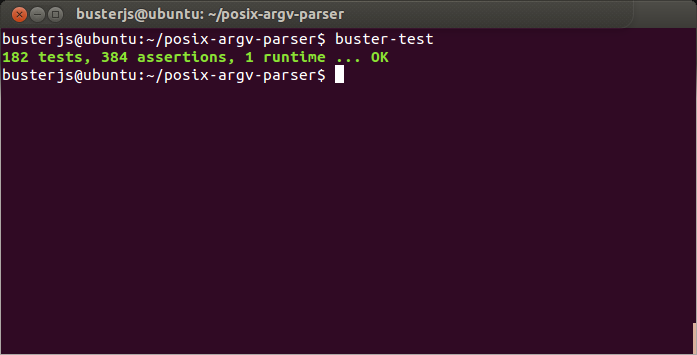
buster-test binary to get at the full power of Buster.JS. Open a terminal,
cd to your project, and type in buster-test. Here’s the output from
the test run of posix-argv-parser:
See the Node.js testing documentation for more.
Browser tests
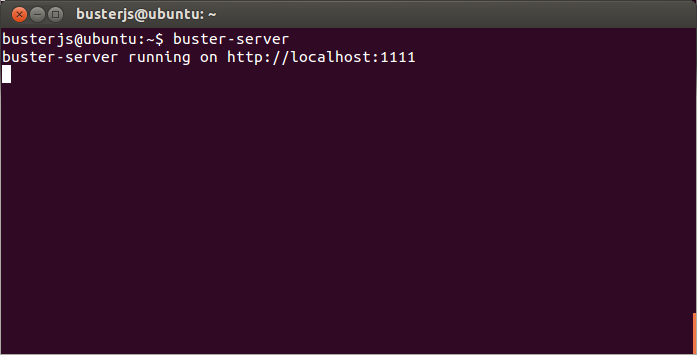
First, start a server. Open a terminal and type in buster-server.
Capture some browsers to run the tests in by visiting the URL. Click the grey capture button to actually perform the capture.

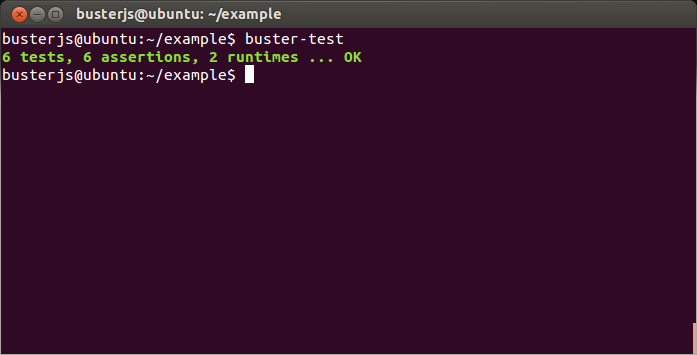
Then you’re ready to run the tests with buster-test.
See the browser testing documentation for more.
Hybrid tests
If your project has both Node.js and browser tests, and your config file specifies
multiple groups for the different environments, running buster test will
automatically run all the groups, both Node.js and browser. This requires that you
already have a buster-server up and running.
If you only want to run tests for one environment, use
buster test --environment browser or buster test -e node.
You have to manually make sure your test cases and source files are able to run in both browsers and Node.js. Here’s an example:
if (typeof require != "undefined") {
    var buster = require("buster");
    var myLib = require("../lib/my-lib");
}

buster.testCase("A test case", {
    "test it": function () {
        assert(true);
    }
});
See the hybrid testing documentation for more.